Dallas Cowboy Pizza

Its summer guys and gals! What better way to have a quick, yummy bite when you’re day is full of festivals and beach time than a quick (but amazing) Cowboy Pizza?

Now if you didn’t know by now, I’m a huge football fan. Since I am from Texas, it’s also no surprise that I’m a part of Cowboy Nation, a citizen who bleeds blue, a Dallas Cowboy fan. They’re the team with the largest fan base and the largest franchise in the NFL. So it’s no surprise that, being from Texas, they have their own BBQ sauce! And this, dudes and dames, is what has inspired today’s meal.

I’m working full time these days with a part time design job so my days are pretty busy. Because of this, I like to cook stuff ahead of time so when my heels are on fire, I can grab it, re-heat it and eat it right up! So you’ll find that a couple of the ingredients are just chopped and thrown on the pizza. If you have any questions as to how I prepared them, by all means, don’t be shy and drop me a line!

What you’ll need:

  • 8 oz (two – three tenders) of grilled chicken sliced thin
  • ¼ cup crispy bacon pieces
  • ¼ cup white onions
  • 4 slices smoked provolone cheese
  • ½ cup cheddar cheese
  • ¾ cup Official Dallas Cowboys BBQ sauce
  • Premade, no freeze pizza crust

How to prepare:

  1. Sauce up the pizza crust ¾ is just enough to cover my pie. You can always add more. Just don’t add too much or you’ll end up with a soggy mess!
  2. Cover the BBQ sauce with torn slices of provolone cheese.
  3. Toss on the chicken, bacon and onions. I like to drizzle some a bit BBQ sauce after this step so the chicken doesn’t dry out in the baking process. But that’s optional.
  4. Top everything off with that generous helping of cheddar cheese!
  5. Bake at 425* for about 10 minutes or until cheese is nice and bubbly.
  6. Let cool for 2 minutes and enjoy!
Dinner Party: Dessert

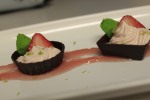
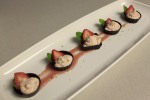
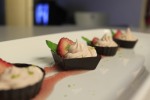
Rockabilly woman love pretty things. Anything from shoes and dresses to hair bows and necklaces. But one thing that is often very pretty and doesn’t get enough attention for being pretty  is food! So for my dinner party, I made sure I made my guests something very pretty to finish off their meal with. An all-American pastry cup with something salty and sweet paired with something dark and pink – what a fashion combo! For my guests, I made my Strawberry Margarita Mousse tarts! Long name, short life span – they’re gone in two seconds!

What you’ll need:

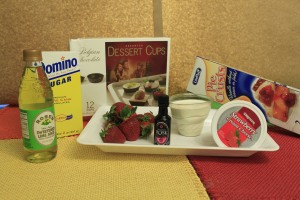
8 oz strawberry cream cheese
1 pint heavy cream for whipping (kept very cold)
2 tbs sweetened lime juice
1/4 cup strawberry tequila
2 tbs sugar
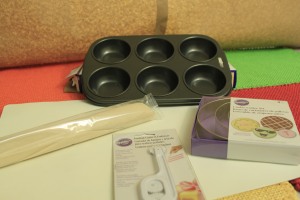
1 box easy pie crust (or any pie dough)
chocolate dessert shells
8-10 strawberries
1 bunch fresh mint
optional lime zest for garnishing

Also, make sure you have:

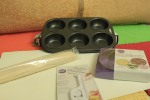
muffin tin
round cookie cutter
pastry cutter with decorative ends

Directions:

1. Add lime juice, sugar, and tequila to cream cheese and whip until soft. Set aside.

2. In a clean bowl, whip heavy cream until soft peaks form. Carefully, fold into cream cheese mixture. Cover with plastic wrap and keep very cold.

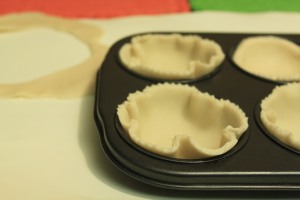
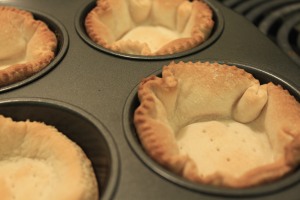
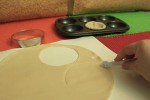
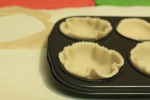
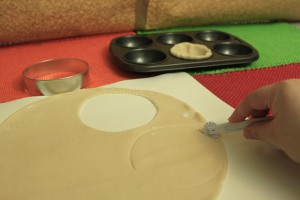
3. Bake pie dough in muffin tins according to directions. Using a fork, generously poke air holes so the pastry doesn’t over puff (like mine did). I used a rotary cutter to give the crust some pretty flair.  When they’re done, set aside to cool.

5. Wash strawberries and cut for presentation. Using a paring knife, you can make different incisions to create different decorations. For the baked pastry cup, I used half a strawberry and made 3 vertical incisions making sure not to cut all the way through to the top. Spread the strawberry apart to make it look like a neat little fan. For the chocolate cup, I just took a sliver of strawberry and placed it neatly upside down with a mint leaf peaking out from behind the strawberry. Place your strawberries in their appropriate cups before the mousse.

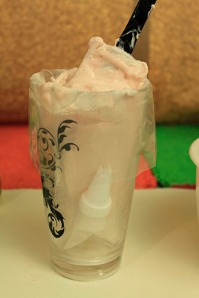
4. Place your cold mousse into a pastry bag with a decorative tip. It’s easiest to do when the bag is sitting in a tall cup and the sides are folded down. This way, you don’t get too messy! Although, as you can see, I somehow still managed to do so. Squeeze mousse into cups so that the base is full but the cup isn’t over flowing. Garnish with some lime zest for color and a bit more of lime flavor.
Now you can enjoy this beautiful, tart and sweet treat with your friends! This is something different and creative they’ll be sure to love! If there are children around, watch they don’t have too many. Remember, these do have liquor in them!
Dinner Party: Entrée, Chile Verde

vintagefolly.com | casserole

Casseroles and baked dishes were the best thing to be brought to the table in the good ol’ days. Something warm, bubbly, often cheesy and with the aroma of love and deliciousness. Mothers and wives often expressed their love for their family through food, dinner in particular. For my dinner party I want to do just that, show my close friends just how much I care for them. I decided to take mine one step further, personalization.


What you’ll need:

1/2 lb of potatoes
1 lb pork loin
1 lb tomatillos (Mexican green tomatoes)
1/2 lb jalapeño
1 bunch cilantro
1 medium Spanish onion
3 tbs chopped garlic
1 tbs of sour cream per personal dish
handful of muenster cheese per personal dish
4-6 cups water
salt and pepper to taste

Directions: The Chile Sauce

1. Wash and quarter tomatillos. On a cookie sheet lined with foil, arrange tomatillos and  sprinkle garlic, pinch of salt and pinch of pepper. Broil until tomatillos are tender (about 15 minutes).

2. Cut caps off jalapeños. Depending on how much heat you like, remove the seeds and veins. Rough chop jalapeños along with the onion.

3. In a blender, puree roasted garlic and tomatillos, chopped jalapeños, chopped onion. Add 1/4 cup of water at a time, if needed. Set mixture aside.

Direction: The “Stewage”

1. Chop pork loin and potatoes cubes about 1/2 to 1/4 inch, depending on your preference.

2. Heat a large pot and ad oil. When ready, add pork. Season with salt and pepper.

3. When meat is almost fully white, add potatoes and stir. Potatoes take a lot of seasoning so if sodium isn’t an issue, add some salt!

4. When potatoes begin to look translucent add chile sauce and enough water so that everything is submerged in liquid. Heat to a boil and reduce heat  stirring often. When potatoes are cooked through but still firm, remove from heat.

Directions: Getting Baked

1. Fill a personal baking dish just to the top of the ramekin. Dollop on some sour cream and sprinkle cheese.

2. Broil until cheese is oozy and gooey.

3. Let stand about 2 minutes and garnish with a sprig cilantro.

The flavors in this dish are rustic and bold but pass through your palette very smoothly. Your guests will enjoy the personalization and time you took to prepare this meal. Mine certainly did! My after photos aren’t the greatest and that’s because they were dogs at the door when this dish came out of the oven.

Dinner Party: Chicken Sausage and Corn Chutney Tacos

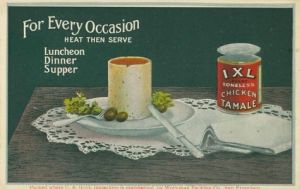
San Francisco chicken tamale Mexican food advertising

San Francisco Chicken Tamale | Vintagepostcards.org

Mexican food has come a long way in America since the early 1900’s. No longer are we canning tamales or referring to Taco Bell as the ultimate ethnic experience. Since my dinner party will be Mexican/Spanish/Hispanic themed or inspired, I’ve decided to make my guests another appetizer that’s a little more familiar but with a “gourmet” twist: chicken sausage and corn chutney taquitos.

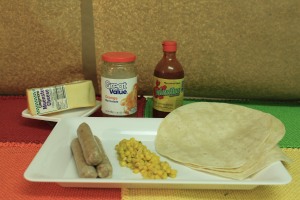
Here’s what you’ll need: 

2-3 links Jalapeno sausage
1/8 cup Valentina hot sauce
3 tbs orange marmalade
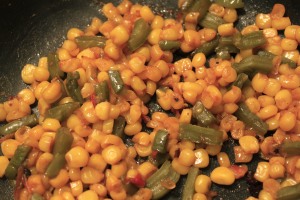
1/2 cup Mexican style corn
1/8 cup chopped Nopalitos
3 small flour tortillas
3 tbs shredded munster cheese
3 cups vegetable oil for frying
optional:  orange peel and lime zest for garnishing

Directions:

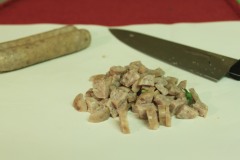
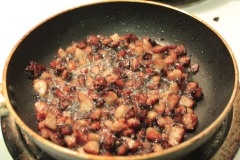
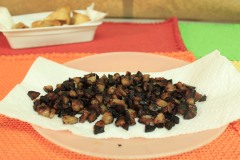
1. Dice chicken sausage and brown. Move to paper towel to dry off excess oil. Set aside.
(My sausage browned a little more than I planned. It all worked out fine, but you might want yours a little less burnt!)

2. Mix corn, Valentina hot sauce, orange marmalade and rough chopped nopalitos.

3. Add sausage and cheese to corn mixture. Allow flavors to bind.

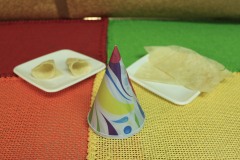
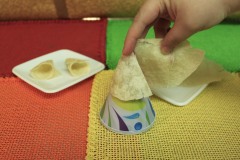
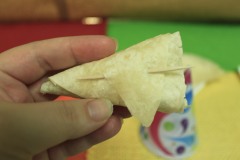
4. Cut tortillas in half. Roll into a cone shape and secure inside “flap” with tooth pick. (I used a snow cone cup to help shape mine.)

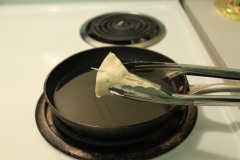
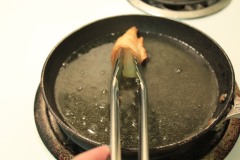
5. Lightly fry tortilla cones using tongs to ensure center doesn’t over puff.

6. Dry on plate lined with paper towel.

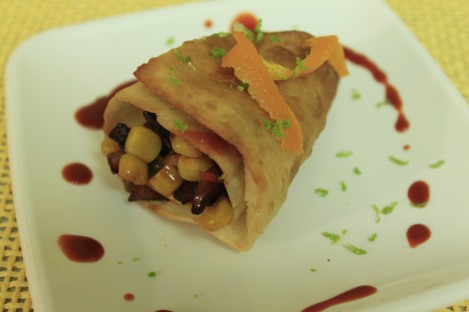
7. Carefully fill the crispy tortilla cones with the mixture and top with an orange peel. I added a drizzle of the Valentina and lime zest for added pzazz!

If your guests like the heat, put out a bit of the Valentina sauce for dipping! It’s a great, tangy sauce that’s used in the Southwest  for similar hand and street foods. You might even find yourself using it in other recipes where you want a zing but not quite the heat of a chile. So put down the fork and knife, and grab a napkin, you’re having Mexican street food… with a twist!

Happy eating!

Dinner Party: Tostaditas

Dinner Party 1954

"Dinner Party 1954" by Amara (MsBlueSky on Flickr)

Dinner Parties were all the rage in the 50’s and 60’s… and they still are today! Well, at least in my home they are. I’ll be having an intimate dinner party for 5 this weekend and want to give my guests something to talk about until my next shin dig. As for my readers, I’ll be giving you a Dinner Party series starting with 1 of 3 appetizers: Tostaditas!

Tostadas are traditionally fried corn tortillas topped with refried beans, lettuce, tomato and cheese. You can also add just about anything else you can pile on without that baby toppling over. For this intimate affair I’ll be serving traditional mini tostadas – tostaditas – with red and green tomatoes for a fresh and light, bite sized crunch.

Here’s what you’ll need: 

2 corn tortillas
1/8 cup and 1 1/2 cups separated vegetable oil
1 1/2 cups frijoles de la olla (beans from the pot) or 1 can pinto beans with liquid
1/4 tsp onion powder
1 cup shredded lettuce
1 cup queso fresco or shredded mozzarella
1 cup fresh diced red tomatoes
1 cup fresh diced green tomatoes
Optional: cilantro for garnish
Optional: sour cream to garnish or dollop on top
salt and pepper to taste

Directions

1. Preheat 1 1/2 cups vegetable oil over medium high heat.

2. While oil is heating, using a small, round cookie cutter, punch out three small discs from each corn tortilla.

3. Fry each tortilla disc until golden brown and place on a plate lined with paper towels to absorb excess oil and set aside.

4. Using a clean pan, heat 1/8 cup vegetable oil. When oil is ready (try this trick to test the oil) add pinto beans, onion powder and a pinch of salt. Stir and allow to cook.

5. When dry bubbles start to form around the pan, using a potato masher, mash the beans to a smooth but still textured consistency, like lumpy mashed potatoes. Heat for about 5 more minutes.

This is what they should end up looking like.

6. Take about a tablespoon of beans and spread over your mini tortilla discs.

7. Add lettuce, crumbled queso fresco or shredded cheese, tomatoes and a dash of salt and pepper. Garnish with a sprig of cilantro and sour cream.

8. Enjoy these awesome, bite-sized tostaditas with some good wine and even better company!

 Stay tuned for some more Mexican inspired appetizers in this Dinner Party series.

Happy eating!